In today’s fast-paced digital age, our smartphones are the gateways to our personal and professional lives. Whether it’s managing important emails, staying connected with loved ones, or simply scrolling through our favorite social media feeds, our mobile devices have become an indispensable part of our daily routine. However, in the hustle and bustle of modern life, it’s all too easy to forget your smartphone’s password, PIN, or pattern lock. If you’ve found yourself locked out of your Samsung Galaxy A12, don’t fret. In this article, we’ll guide you through some easy and effective methods to regain access to your device, ensuring that you can get back to using your Samsung Galaxy A12 without any hassle. Whether you’ve forgotten your password, PIN, or pattern lock, we’ve got you covered with step-by-step solutions to unlock your device securely. Read on to discover the key to unlocking your digital world once more.
Using Samsung Find My Mobile
Unlocking your Samsung Galaxy A12 without losing any valuable data is a seamless process, thanks to Samsung’s Find My Mobile feature. Follow these straightforward steps to regain access to your device while preserving all your important information:
Step 1: Sign In to Find My Mobile
- Begin by launching the Find My Mobile application on a web browser or another device;
- Click on the “Sign In” button to access the platform.
Step 2: Enter Your Account Credentials
Provide the login credentials associated with your Samsung account, ensuring they match those linked to your Galaxy A12.
Step 3: Select Your Device
Within the “My devices” tab located at the top of the screen, choose your Samsung Galaxy A12.
Step 4: Choose “Unlock”
- A small pop-up window will appear in the top right corner of the screen;
- Select the “Unlock” option from this window.
Step 5: Acknowledge the Warning
- You’ll receive a warning message notifying you that all screen lock information, including patterns, pins, passwords, and biometrics, will be deleted;
- Proceed by clicking the “Unlock” option at the bottom of the warning.
Step 6: Confirm with Your Account Password
Confirm your decision by entering your Samsung account password.
Step 7: Wait for the Unlocking Process
Exercise patience as the unlocking process unfolds.
Upon successful completion, you’ll receive a message confirming, “Your phone is unlocked.”
By following these steps, you can effortlessly regain access to your Samsung Galaxy A12 without compromising your data’s integrity.
Additional Tips:
Ensure your device is connected to the internet for Find My Mobile to work effectively.
This method is especially useful if you’ve forgotten your password or pattern lock.
Using Smart Lock
When you’ve forgotten your password for the Samsung Galaxy A12 and want to retain your data, the Smart Lock feature comes to the rescue. However, this method requires that you’ve previously set up Smart Lock with one of its three options: On-Body detection, trusted devices, or trusted places.
Let’s explore how to utilize this feature:
Step 1: Access Your Settings
Navigate to the “Settings” app on your Samsung Galaxy A12.
Step 2: Select Lock Screen and Smart Lock
Tap “Lock screen,” then choose “Smart Lock” from the menu.
Step 3: Choose Your Unlocking Option
Within the Smart Lock settings, select one of the three available options:
- On-Body Detection: The device remains unlocked while it senses it’s on your person;
- Trusted Devices: Your phone unlocks when connected to specific devices, like a Bluetooth headset;
- Trusted Places: Designate locations where your phone remains unlocked, such as your home.
Step 4: Follow On-Screen Instructions
Once you’ve made your selection, follow the on-screen instructions to set up Smart Lock.
Now, whenever your Samsung Galaxy A12 detects the chosen criteria, it will automatically unlock without requiring the forgotten password.
Additional Insights:
Smart Lock offers convenience while maintaining your data’s security.
It’s advisable to choose trusted places like your home or workplace, as On-Body detection might not always be foolproof, and trusted devices require compatible accessories.
Regularly review and update your Smart Lock settings as needed to ensure your device’s security.
Google Security Questions
Unlocking your Samsung Galaxy A12 can be a breeze if you’ve set up security questions under your Google account. This extra layer of protection ensures that even if you forget your PIN, pattern, or password, you have a way back into your device. Here’s a detailed guide on how to do it:
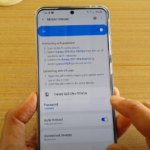
Step 1: Access the “Forgot Pattern” or “Forgot PIN/Password” Option
If you’ve made multiple incorrect attempts to unlock your phone, you’ll see the “Forgot Pattern” or “Forgot PIN/Password” option pop up. This is your entry point to regaining access to your Samsung Galaxy A12.
Step 2: Select “Answer Questions”
Tap on the “Answer Questions” option, which will direct you to your Google security questions.
Step 3: Answer Your Google Security Questions
Here’s where you need to recall the security questions you’ve set up in your Google account. Answer them accurately to proceed.
Step 4: Unlock Your Samsung Galaxy A12
If your answers match what you’ve set up earlier, your Samsung Galaxy A12 will unlock, granting you access to your device once again.
Step 5: Create a New PIN, Password, or Pattern Lock
- After successfully unlocking your phone, it’s a good practice to set up a new PIN, password, or pattern lock for added security. Here are some tips for creating a strong one;
- Use a combination of letters, numbers, and special characters;
- Avoid easily guessable information like birthdays or names;
- Consider using a passphrase for added complexity;
- Update your security options regularly to stay protected.
Using Your Gmail Account
Another handy method for unlocking your Samsung Galaxy A12 involves your Gmail account. Here’s how you can do it:
Step 1: Access the “Forgot Pattern” or “Forgot PIN/Password” Option
If you’ve made several unsuccessful attempts to unlock your phone, the “Forgot Pattern” or “Forgot PIN/Password” option will become available.
Step 2: Log In with Your Google (Gmail) Account
Enter your Google account details, including your username and password, to log in.
Step 3: Successfully Unlock Your Smartphone
Once you’ve successfully logged in, your Samsung Galaxy A12 will be unlocked, granting you access to all its features and data.
Additional Tips:
- If you’ve forgotten your Gmail account details, make sure to recover your Google account before attempting this method;
- Be cautious when entering your Gmail credentials to avoid further lockouts;
- Regularly back up your data to prevent any potential loss during unlocking processes;
- Consider using a secure password manager to store and retrieve your account details safely.
Using Android Data Recovery Tool
Another reliable method involves using the popular Dr.Fone Software, which provides a user-friendly interface and effective results. Follow these comprehensive steps to unlock your device securely:
Step 1: Download and Install Dr.Fone Software
- Begin by downloading the Dr.Fone Software from the official website or a trusted source;
- Install the software on your computer following the on-screen instructions;
- Ensure you download the latest version for the best results and security.
Step 2: Launch Dr.Fone
After installation, launch the Dr.Fone Software on your computer. Make sure your smartphone is not connected at this point.
Step 3: Connect Your Smartphone
- Use the original USB cable that came with your Samsung Galaxy A12 to connect it to your computer;
- Ensure that your device is powered on and has sufficient battery life to complete the process.
Step 4: Detecting Your Smartphone
- Dr.Fone will automatically detect your smartphone model and start the detection process. This may take a moment, so please be patient;
- Make sure that you have the necessary USB drivers installed for your specific smartphone model. If not, Dr.Fone will prompt you to download and install them.
Step 5: Follow On-Screen Instructions
- Once your smartphone is detected, follow the on-screen instructions provided by Dr.Fone. These instructions may vary based on your specific device and situation;
- Be sure to carefully read and understand each step to avoid any errors.
Step 6: Customize Options
- Dr.Fone offers various options depending on your needs, such as unlocking the device, recovering data, or fixing issues. Select the appropriate option according to your goal.
- Carefully customize the settings to suit your requirements.
Step 7: Unlock Your Samsung Galaxy A12
- After configuring the settings, initiate the unlocking process by clicking the relevant button on Dr.Fone;
- Dr.Fone will work its magic, and once the process is complete, your Samsung Galaxy A12 will be successfully unlocked.
Using Android Multi-Tool
Step 1: Download Android Multi-Tool Software
Begin by downloading the Android Multi-Tool Software from a trusted source. Ensure that you are getting the latest version to access the most up-to-date features and security.
Step 2: Install USB Drivers
- To ensure seamless communication between your smartphone and the computer, you need to install the required USB drivers for your specific Samsung Galaxy A12 model;
- Check the manufacturer’s website for the appropriate drivers or refer to the user manual for guidance.
Step 3: Connect Your Smartphone
- Use the original USB cable provided with your Samsung Galaxy A12 to establish a connection between your smartphone and computer;
- Ensure that your device is powered on and has enough battery life for the process.
Step 4: Launch Android Multi-Tool
- After successfully connecting your device, launch the Android Multi-Tool on your computer. You should see a user-friendly interface with various options.
Step 5: Enter Commands
- In the Multi-Tool window, you’ll find a range of commands and options for different tasks. To unlock your Samsung Galaxy A12, enter the relevant commands as instructed by the tool;
- Pay close attention to the prompts and execute the commands accurately.
Step 6: Begin Unlocking
- Once you’ve entered the necessary commands, initiate the unlocking process within the Multi-Tool;
- The tool will carry out the required steps to unlock your Samsung Galaxy A12 securely.
Google Find My Device
Step 1: Access Google Find My Device
- Begin by opening Google Find My Device on a web browser from your computer or another device;
- Sign in to your Google account with the same credentials you used on your locked Samsung Galaxy A12.
Step 2: Select “Erase Device”
After successfully signing in, locate and select the “Erase Device” option from the left-hand menu.
Step 3: Confirm Data Erasure
You’ll be prompted to confirm your decision. Click on “Erase All Data” to initiate the process.
Step 4: Begin Data Erasure
As soon as you hit the “Erase” button, the data deletion on your Samsung Galaxy A12 will commence. This may take a few moments, and your device will be wiped clean, returning it to its factory settings.
Tips and Recommendations:
- Before performing this action, ensure that you have a recent backup of your important data;
- Use this method as a last resort, as it will erase all your data, including apps, photos, and settings;
- Remember your Google account credentials to successfully sign in to Google Find My Device.
Hard Reset (Factory Reset) Samsung Galaxy A12 to Unlock
If you find yourself in a situation where Google Find My Device doesn’t work or you can’t access it, your last resort is to perform a factory reset, also known as a hard reset, on your Samsung Galaxy A12. This method will wipe your device clean and unlock it. Here’s how to do it:
Step 1: Power Off Your Device
Begin by turning off your Samsung Galaxy A12. You can do this by simultaneously pressing the “Volume Down” and “Power” buttons.
Step 2: Enter Recovery Mode
Turn the device back on by pressing the “Power” and “Volume Up” buttons together for a few seconds. Release the “Power” key once you see the Samsung logo on the screen.
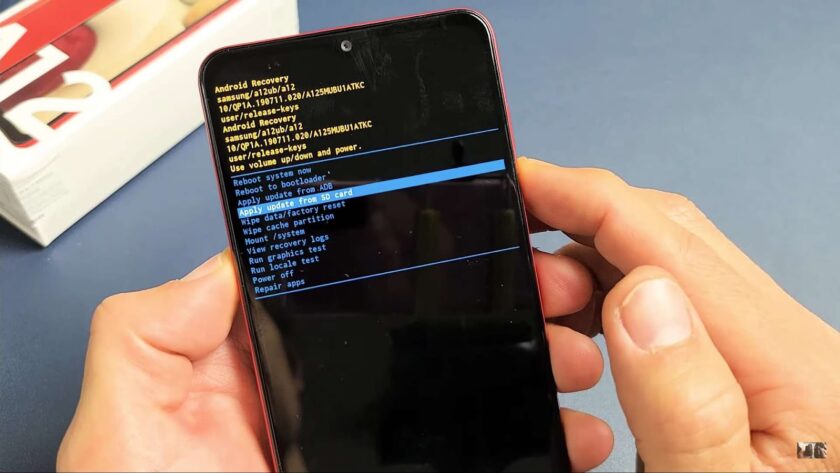
Step 3: Wipe Data and Factory Reset
In recovery mode, use the volume buttons to navigate through the options. Select the “Wipe data/factory reset” option and confirm it by pressing the power button.
Step 4: Confirm Factory Reset
Finally, confirm your decision by selecting “Yes” on the screen.
Congratulations! You’ve successfully performed a factory reset on your Samsung Galaxy A12 without needing a password.
Conclusion
Experiencing the inability to access your own device due to the unfortunate occurrence of forgetting your PIN, password, or pattern lock can be a truly exasperating ordeal.
Nonetheless, by adhering to the methods outlined above, you have the opportunity to regain access to your Samsung Galaxy A12 without the risk of losing any vital data, provided you recall the answers to your Google account security questions.